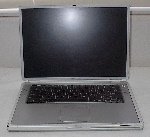
 Earlier this week I purchased a replacement 2.5 inch hard drive for my Powerbook G4 and it arrived this Friday. I'm very pleased to have it. Although I didn't have to wait long, newegg really has excellent shipping in my experience.
The original 40gb drive that came in the Powerbook started failing in the spring and I bought Diskwarrior to rebuild the directory structure and that fixed everything till about 2 weeks ago when it failed to book again. I let Diskwarrior do it's thing but the directory tree was so damaged that the system remained unbootable. I could have just reinstalled Mac OS X on it then but I knew the problem was with the hard drive so I decided it was a much better idea to replace it completely than risk having it crash at an inopportune time.
In any case I got myself a brand new 100 GB 7200 RPM Hitachi Travelstar 2.5 inch hard drive. I could have just sent it in to be replaced but that would have been more expensive and less fun. I've always wanted to take apart my Powerbook. But a couple things have stopped me. One I didn't have the tool, a T8 Torx, I bought that at sears for $3. And second its a lot easier to damage a laptop, or loose a screw and much more expensive to replace than a desktop system.
Anyway, since my Powerbook G4 isn't worth as much as it once was. It's an 800mhz with 512 mb of ram, originally 40 GB hard drive, airport card and 15 inch screen. And that should be about $600 but it's been dropped so the case is warped and the latch doesn't quite work and the paint is chipped. It's what you might call battle scarred. So I might not even get that much. So with that in mind I wasn't risking a whole lot and with the added benefit if I completely botched the job I could get a new MacBook!
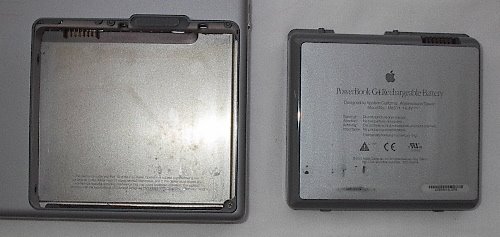 So it was with much nervous excitement I turned my Powerbook over and removed the battery from the case. (The next upgrade I'll get will probably be a better battery.)
 That step was simple enough to complete and with the battery out of the way I was ready to remove the screws.
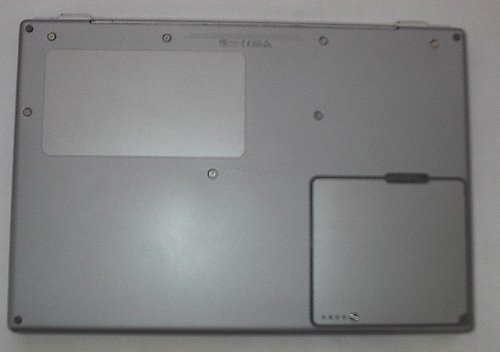 I weilded my brand new Torx T8 and took them all out one by one taping them to a sticky note and labeling them so I would remember where they went. I even made sure to lay them out on the sticky note so I could put them back in the exact same hole that I removed them from. As you can see there were 7 screws in all most of them towards the back where the screen is attached. Some of them had some of that blue goo that is used to keep them from wiggling out so they were a bit harder to get started.
With the screws out of the way I was a bit worried about removing the case bottom itself. But it came off very easily. It doesn't come off straight up. There are little groves in the side so you have to slide it forward towards the battery compartment.
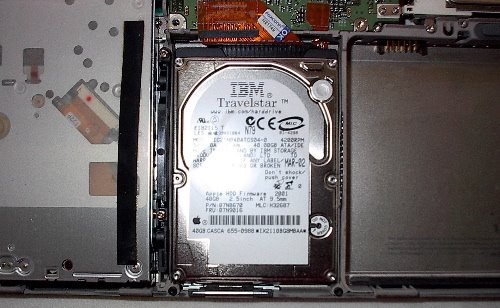
Ah finally, I'm actually inside the case. Look at all those chips and resistors a lot of green and there in the center the object of my quest the failing hard drive.
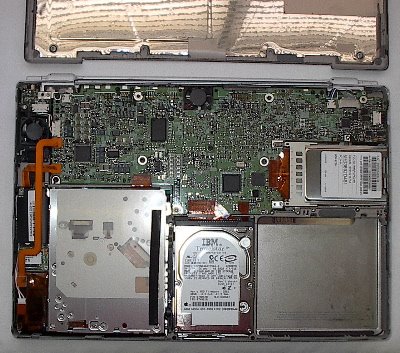
The T8 Torx I have is a bit long so I wasn't sure how it would work on removing the 2 screws holding the harddrive in place that are accessible to through the battery bay. The angle wasn't a problem and I soon had them taped to there own sticky pad as well.
 Oh I guess I actually disconnected the little cable connecting the hard drive to the motherboard first. Otherwise I would not have been able to carefully lever out the old drive to make space for the new. The old drive had two rubber grommets on the left side, a plastic shield and the cable that all had to be removed so they could be attatched to the new drive. Which I did. Getting the new drive in the space for it was a little tricky just getting things to line up and slide in, but once it was in it was easy enough to replace the screws.
The tricky part was getting the case bottom back on. It actually slid in place fairly easy and I got all the screws in. And when I turned it on everything looked great! So I reinstalled Mac OS X 10.4 and downloaded the updates but then I noticed that if I moved windows around it would leave little scattered pixels and other garbage all over the screen! This was very bad. I figured that I must not have the case bottom on quite right because there was a little crack along the back. So I opened it up again and the only thing that I could see was the case was a bit warped so it wasn't fitting quite right. So I tilted it up on it's side so I could put some lite pressure on the right hinge and screw it into place. And luckily for me it worked. The crack dissapeareda nd I've been using my laptop since friday with no more screen jitters!
Well overall I'm very pleased. I haven't had much of a chance to test how much faster this drive is but it seems to work well enough. Although it seems to make more noise, but that might be because I'm not used to it's noises.
2 comments:
Great job! I love those kinds of projects.
Ezra
only you could pull off something like that.. i wish you'd had longer to tinker with sammy's laptop. i'd love to have seen that get fixed.
Post a Comment